Save views and schedule reports
Saved Views keep a filter or crosstab by name, so you don’t rebuild it next time. Scheduled Reports email a survey’s results to your team on a schedule. Both are on Growth and above, and both are in the left menu under Responses. On lower plans they show a padlock and open an upgrade prompt.
- To save a filter, crosstab or view, your Reporting access on the survey must be Full Access. Owners, admins and editors have that by default. Viewers have View Only, and can apply what others share.
- To schedule a report, you need to be able to see the survey’s responses and have permission to edit workflows in the workspace.
Save a filter
Section titled “Save a filter”-
Open the survey and click Responses in the top bar. If you need the steps, see See your survey’s results.
-
Set your filters. See Filter your results.
-
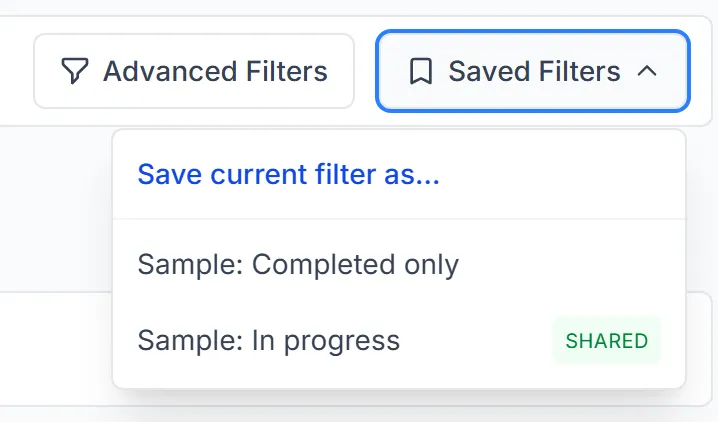
Click Saved Filters, then Save current filter as….
-
Type a name and click Save.
Saved Filters is on the Response Dashboard, the Respondent List and Text Analysis. To use a saved filter, open the menu and click its name. The page reloads with the filter on.
Save a crosstab
Section titled “Save a crosstab”- Build the crosstab. See Build a crosstab.
- Click Saved Crosstabs, then Save this crosstab as….
- Type a name and click Save.
This keeps the row and column variables and the Row %, Column %, Total % and Show hidden settings. It doesn’t keep the filter or Value Grouping. To keep a filter with a crosstab, combine them in a view.
To use a saved crosstab, open Saved Crosstabs and click its name. The table builds straight away.
Combine a filter and a crosstab into a view
Section titled “Combine a filter and a crosstab into a view”Do this once you have saved at least one filter or crosstab of your own.
- In the left menu, click Saved Views.
- Under Create a view, type a Name.
- Choose a Saved filter, a Crosstab, or both.
- Click Create view.
The view appears under Your saved views. When you apply it, a view with a crosstab opens the Crosstab page, and a view with only a filter opens the Response Dashboard.
Manage what you’ve saved
Section titled “Manage what you’ve saved”Everything you’ve saved on this survey is under Your saved views on the Saved Views page, marked Saved filter, Crosstab or View.
| Button | What it does |
|---|---|
| Apply | Opens the page it belongs to, with the item in place |
| Rename | Changes the name |
| Share | Lists it under Shared with you for others on this survey. Unshare takes it back |
| Delete | Removes it. This cannot be undone |
Only you can change or delete something you shared. Others can Apply it or, with Full Access, click Save as my own copy to make a version they can change.
A saved item belongs to the survey you saved it on. It doesn’t appear on other surveys.
Schedule a report
Section titled “Schedule a report”-
Open the survey and click Responses in the top bar.
-
In the left menu, click Scheduled Reports.
-
Click New scheduled report.
-
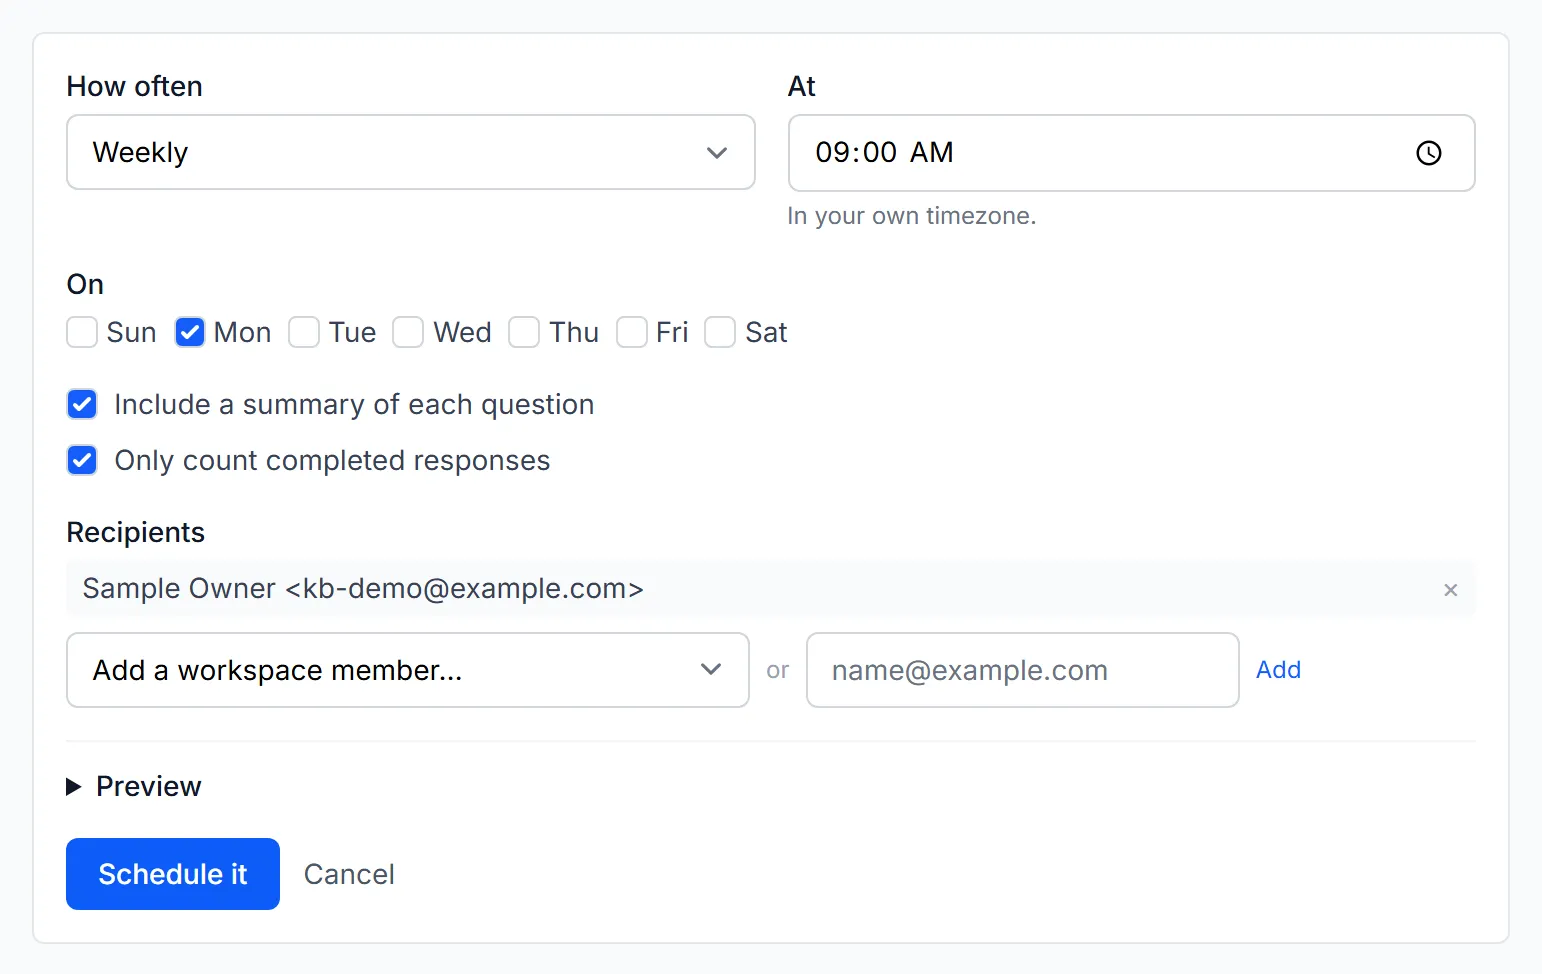
Under How often, choose Daily, Weekly or Monthly.
-
Under At, set the time. It uses your own timezone.
-
For a weekly report, tick the days under On. For a monthly report, set Day of month.
-
Leave Include a summary of each question and Only count completed responses ticked, or clear them.
-
Under Recipients, choose someone from Add a workspace member…, or type an email address and click Add. You can add up to 20.
-
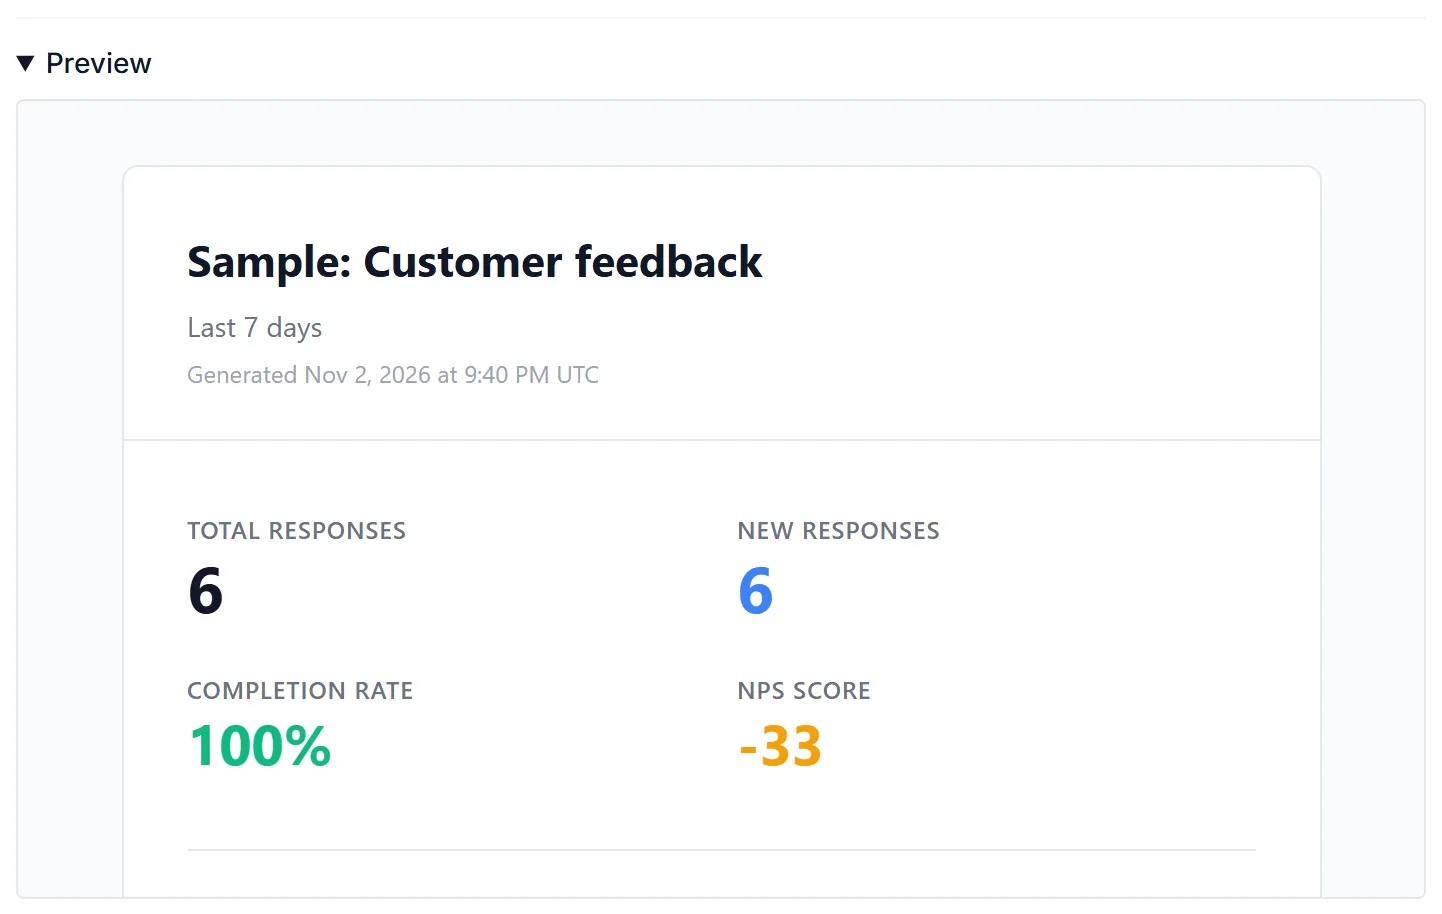
To see the email first, open Preview.
-
Click Schedule it.
The page reloads and the report is in the list, marked Active, with the date of the next one. Behind the scenes this creates an ordinary workflow, so you’ll also find it under Workflows.
Anyone you add gets the survey’s numbers by email, whether or not they have a SurveyRock account.
What the email contains
Section titled “What the email contains”Each recipient gets their own email, with the subject “Scheduled report: “ and the survey’s name. It covers the last 24 hours for a daily report, the last 7 days for a weekly report and the last 30 days for a monthly report.
- Total Responses, New Responses and Completion Rate
- One more figure: NPS Score if there is one, otherwise Avg. Rating, otherwise Started
- Question Summaries, if you ticked that option. Written answers aren’t quoted, only counted
- A link to the full results
If nothing came in, the email still goes out and says “No new responses”.
Manage a scheduled report
Section titled “Manage a scheduled report”Each report on the Scheduled Reports page has these buttons:
| Button | What it does |
|---|---|
| Pause | Stops the emails. Reports that fall due while it is paused are skipped, not sent late |
| Resume | Starts it again. The page says when the next one goes out |
| Edit | Opens the report’s workflow in the workflow editor, where you can change it |
| Delete | Removes it. This cannot be undone |
There’s no way to change the schedule or recipients from this page. Use Edit, then publish your change in the editor.
Example
Section titled “Example”You run a monthly customer pulse. You build a filter for finished responses from your email campaign, save it as “Email campaign”, and build a crosstab of satisfaction by region. You combine them in a view called “Monthly review” and share it so your team can apply the same view. Then you schedule a report for the first of each month at 09:00, and add your team as recipients.
Troubleshooting
Section titled “Troubleshooting”Saved Filters or Saved Crosstabs isn’t on the page. You need Full Access under Reporting on this survey, on the Growth plan or above. Crosstab has no Saved Filters menu. Save the filter on the Response Dashboard, then combine it with a crosstab in a view.
Save this crosstab as… is greyed out. Choose a Row Variable and a Column Variable first.
“Create a view” isn’t on the Saved Views page. You need at least one saved filter or crosstab of your own. Items others shared with you can’t go into a view. Click Save as my own copy first.
An item says “(read-only)” and has no buttons. Your Reporting access on this survey is View Only. Nothing has been lost, and the buttons return if your access goes back to Full Access.
The page says “You can’t create saved views right now.” Your access to this survey’s reporting is read-only or restricted. Anything you had saved is hidden, not deleted. Ask a workspace admin to change your access.
“The report could not be scheduled.” For a weekly report, tick at least one day under On.
“Add at least one recipient.” Add a recipient before you click Schedule it.
“You do not have permission to edit workflows in this workspace.” Ask a workspace admin to change your access.
“Please wait 5 seconds between preview requests.” Close Preview, wait a moment, and open it again.
A monthly report skipped a month. A report set to day 29, 30 or 31 doesn’t go out in a month without that day. Choose an earlier day to get one every month.
A recipient changed their email address. The report keeps the address it was set up with. Use Edit to change it.
The list shows the old recipient count or schedule. The list shows what you chose when you created the report. Changes you make with Edit apply to the report, but not to that line.