Build a workflow
A workflow does a job for you when something happens, like emailing your team when a low score comes in. Workflows need the Team plan or above. On lower plans Workflows isn’t in the top bar. You need a role that can edit workflows: a Viewer can’t create or publish one.
If you’re connecting a workflow to your own systems, see Webhook steps in workflows.
Start a workflow
Section titled “Start a workflow”-
Sign in at app.surveyrock.com. You start on Home.
-
Click Workflows in the top bar.
-
Click the arrow beside Create Workflow, then Start from scratch.
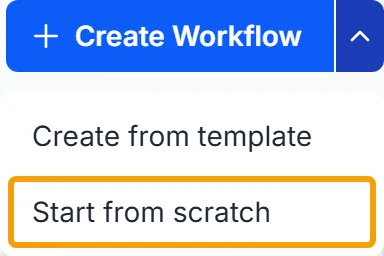
The editor opens with a workflow called “Untitled Workflow”. To rename it, click the name at the top and type.
There are three other ways to start:
- From a survey: open the survey and click Workflows in the top bar. A new workflow starts with that survey as its trigger.
- From a template: click Create Workflow to open Workflow Templates, then choose one. If it needs details, a panel asks for them, and then it opens in the editor.
- From a description: on Pro and Enterprise, click Describe it and say what you want to automate.
Choose the trigger
Section titled “Choose the trigger”The trigger decides when the workflow runs.
-
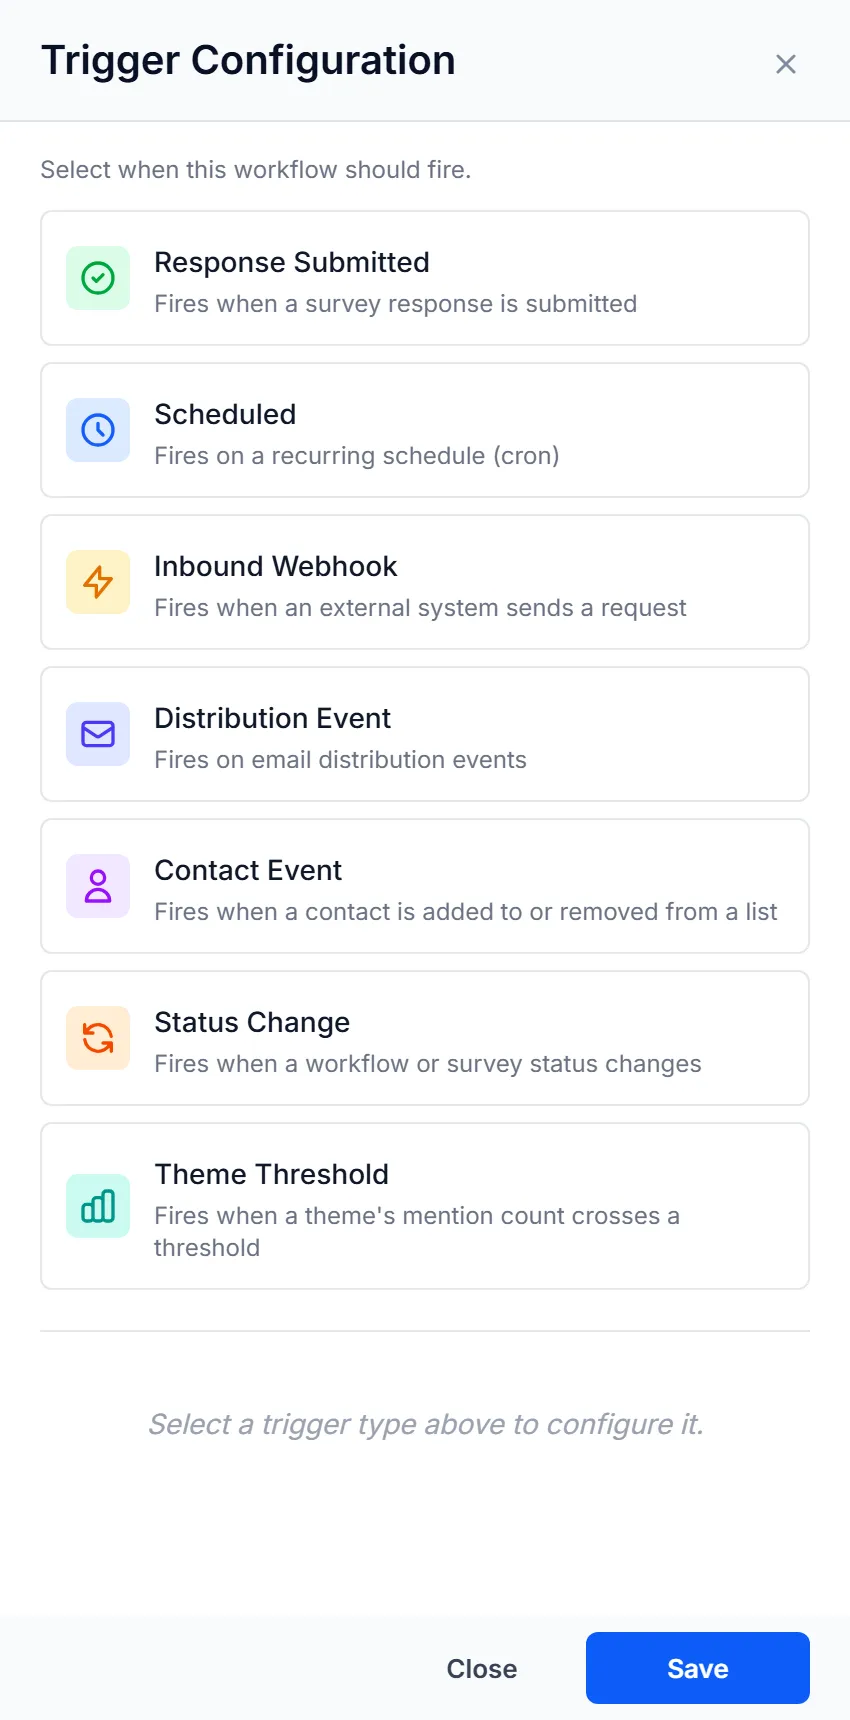
Click the Trigger card at the top. It says “Configuration required” until you set it. The Trigger Configuration panel opens.
-
Choose a trigger type.
-
Fill in the settings. For Response Submitted, choose the Survey, or Any survey in the workspace. To run only for some responses, turn on Only fire when a condition is met.
-
Click Save.
| Trigger | When it fires |
|---|---|
| Response Submitted | A survey response is submitted |
| Scheduled | On a repeating schedule. Team offers Daily, Weekly, Monthly and Yearly. Hourly and more often need Growth or above |
| Inbound Webhook | Another system sends a request |
| Distribution Event | An email campaign’s message is opened, clicked, bounced, marked as spam or unsubscribed from |
| Contact Event | A contact is added to or removed from a list |
| Status Change | A workflow or survey status changes |
| Theme Threshold | A theme’s mention count crosses a threshold. Pro and above |
Add steps
Section titled “Add steps”-
Click the + below the Trigger card.
-
Choose Action. Delay waits before the next step. Condition (If/Else) and Loop need Growth or above.
-
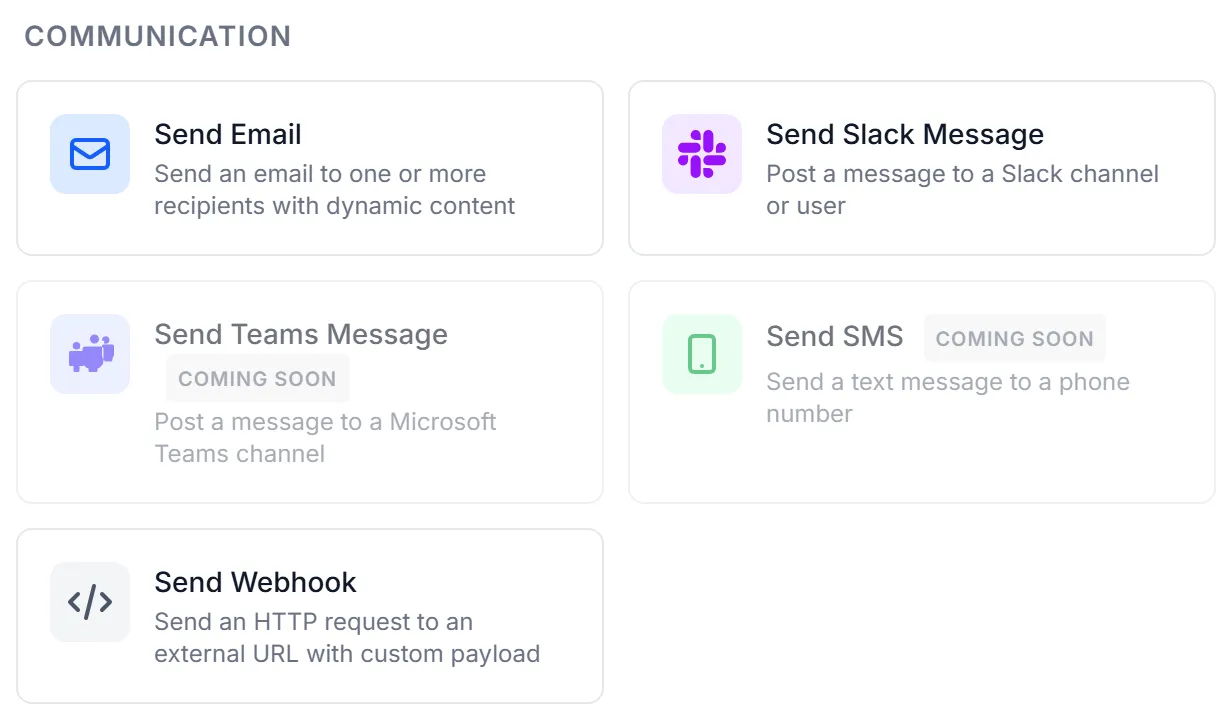
In Choose an Action, click the action you want.
-
Fill in the step. For Send Email, enter To and Subject, then write the message. Tags inserts details from the run, such as an answer.
-
Click Save.
-
To add another step, click the + below the last one. Steps run from top to bottom.
The editor saves your work as you go, but nothing runs until you publish.
| Step | Plan |
|---|---|
| Send Email, Send Webhook, Delay | Team and above |
| Send Slack Message | Team and above. Connect Slack from the step |
| Condition (If/Else), Loop, Survey Digest | Growth and above |
| AI Workflow Step | Pro and above |
| Zendesk Ticket, Freshdesk Ticket | Pro and above. Connect the account in Workspace Settings first |
The panel lists every action. A padlock means your plan doesn’t include it, and clicking it shows the upgrade options.
Test it
Section titled “Test it”You need a trigger before you can test.
- Click Test at the top right. The Test Workflow panel opens.
- For a Response Submitted trigger, click Generate Sample to fill in Trigger Payload.
- Leave Mode on Simulate. It runs every step without sending real emails, Slack messages or webhooks.
- Click Run Test. Execution Results shows what each step did.
Live runs the workflow once for real. It lists what it will send, and nothing goes out until you confirm.
Publish it
Section titled “Publish it”-
Click Publish.
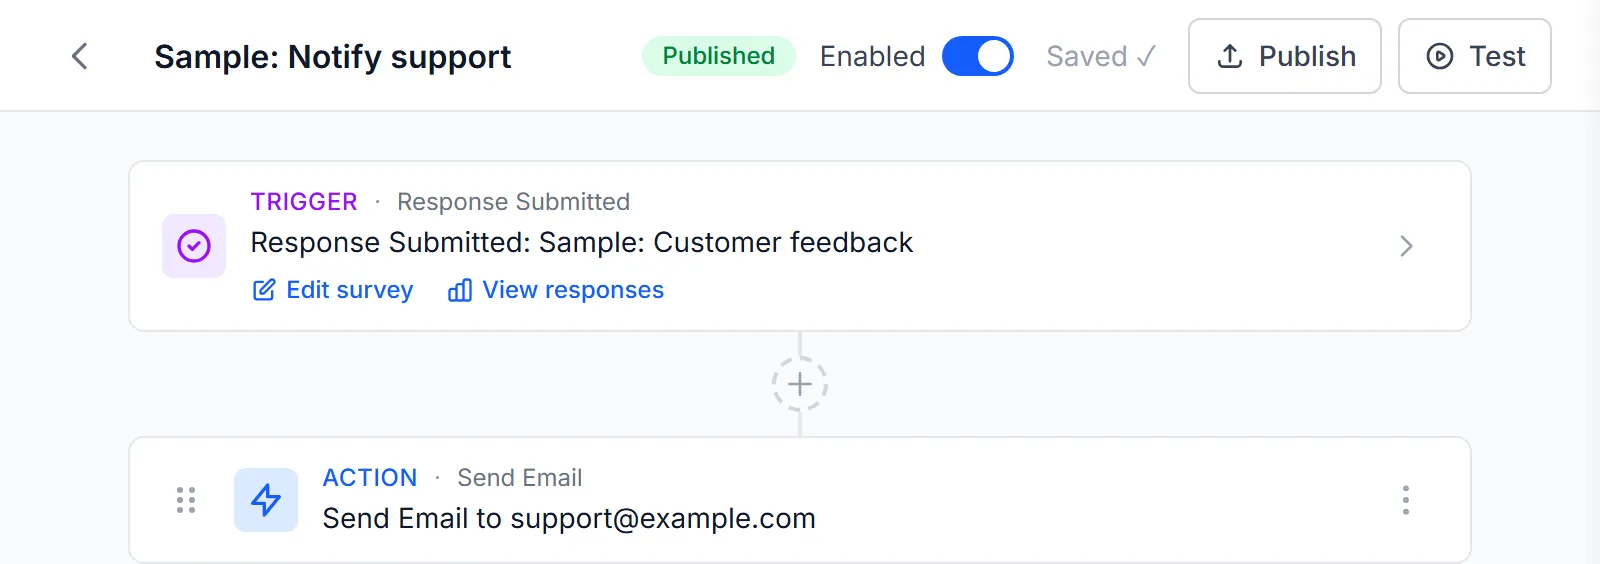
The message says “Workflow published successfully.” The badge changes to Published, Enabled turns on and the workflow starts running.
- To pause it: turn off Enabled.
- To change it: edit the steps. The badge shows Unpublished changes, and the published version keeps running until you click Publish again. Discard changes goes back to the published version.
- To see its runs: click History in the left menu. It’s available after the first publish.
Example
Section titled “Example”You want your support team to hear about low scores. You start a workflow and choose Response Submitted. You pick your NPS survey, turn on Only fire when a condition is met, and set it to scores of 6 or below. You add Send Email with the team’s address in To, and use Tags to put the score in the message. You run it in Simulate, check Execution Results, and click Publish.
Troubleshooting
Section titled “Troubleshooting”The page says “Workflow has validation errors.” The panel below the top bar lists each problem. Click one to go to that step. Two common ones are “A trigger must be configured before publishing.” and “At least one action step is required.”
Publish says a step “requires the Growth plan or higher.” The + menu offers Condition (If/Else) and Loop on Team, but they can’t be published there. Remove the step, or filter responses in the trigger with Only fire when a condition is met.
I can’t see Workflows. Your plan is below Team. Workflows are on the Team plan and above.
Test says “Configure a trigger before testing.” Set the Trigger card and click Save.
The workflow didn’t run. Check that it’s Published and Enabled, and that the trigger names the right survey. Then look in History. If you changed it since publishing, the changes aren’t live until you click Publish.
Hourly isn’t in the Frequency menu. Hourly and more frequent schedules need Growth or above.
An action says “Coming soon.” You can’t use that action yet.