Create a thank-you page to show your survey respondents after they submit their responses. This can consist of one or multiple text elements. In the example below we will combine the thank-you page with conditional text elements based on the respondent’s total score from multiple choice scoring. This feature is available on our Business and Enterprise account plans.
Our goal is to show the user their score from the choices they made. Then, depending on how high that score is, display either one message or a different one. For a simple thank-you, just leave out the additional steps.
Enable or disable the thank-you page
The thank-you page can be enabled or disabled at any time by clicking on the toggle switch next to the page title. When the switch is blue, then the page is active.

Create the page
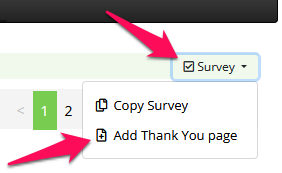
To add a thank-you page to your survey, click on the “Survey” button on the top right of the Edit survey page. Then click on “Add Thank You page“.
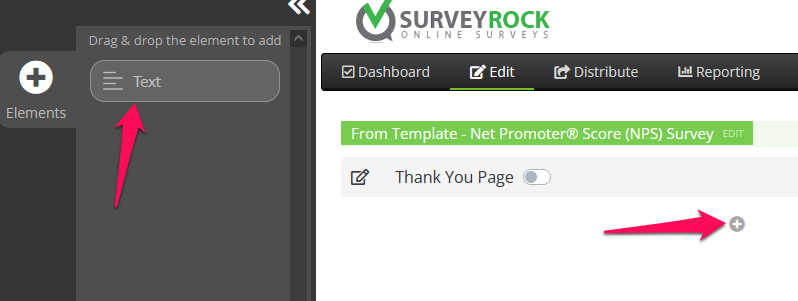
This adds a new “Thank-You” (TY) page in blue at the end of your survey and switches to that page. You can also see by the toggle button on the left that the “Thank-You” page is not currently active (not blue). You don’t want to make it active until all of the planned elements are on this page.

You’ll notice that the only page element type you can drag in from the left menu bar is the Text element. Likewise, clicking on the Add Element “+” button in the middle of the page will directly open a new Text element menu. Either drag in the element from the left or click on the Add Element “+” button now.
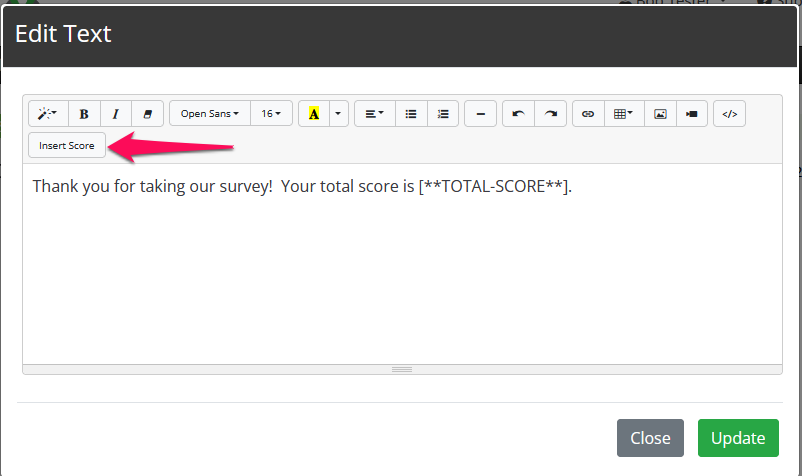
Enter your desired text and when you want to add the total score amount click on the “Insert Score” button. This add the placeholder “[**TOTAL-SCORE**]“. Anytime we find that placeholder text in your survey’s thank-you page, we replace it with the respondent’s total multiple choice score.
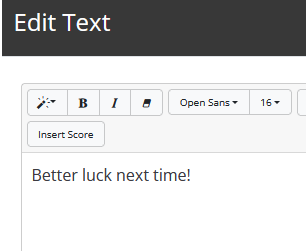
Next we want to add 2 more Text elements. One will be displayed if the respondent’s total score is below 1.5 and the second will be shown if it’s >= 1.5. Click on the Add Element “+” button and the desired text for the first message.
Now add the Text element for the second message.
Add scoring logic
In order to add the scoring logic, click on the Logic button of the first conditional message on the right side of the page. The Logic pop-up window will appear. Click on the “+ Add Rule” button.

Click to change the value operator (=, <, >=, etc.). Change the value amount and then choose whether you want to Show or Hide the element if the criteria is met. Click “Save” when you’re done. If you want to delete a logic rule, click on the trash can icon on the right. When you’re done, click the “Save” button at the bottom.

Follow the same steps for the second conditional message.

The final step is to enable the thank-you page. Click on the toggle switch below the survey name. Grey means the page is disabled. Blue means that it is activated.

Your thank-you page with conditional messages based on the respondent’s total score is now ready for use. When the respondent clicks “Submit” on your survey, they are shown the new thank-you page you have just created.
Leave a reply